Onboard Azure to Yotascale - via Azure CLI
Yotascale needs access to specific data and services in your Azure account in order to provide cost usage and cost-saving recommendations.
In summary, we need access to:
Read your Cost Exports which include detailed cost utilization data
Read Azure Advisor recommendations so that we can aggregate them as recommended savings in a per-business context
Read Azure Container Insights so that can read your container utilization metrics and can show cost attribution based on utilization and container labels. If you don’t use Container Insights, we can capture cluster metrics via a Yotascale agent (which is based on Prometheus) to capture similar metrics
The summary of steps require to onboard your Azure account to Yotascale are:
Enable Exports
Create a customer role with the permission needed to read the information mentioned above
Create an App Registration with will supervise access
Onboard your Azure account to Yotascale in the Yotascale dashboard
This is a table of contents to make it easy to link to specific content:
What you need to do in your Azure Portal to give Yotascale access to Cost Export and Advisor Recommendations
Azure Portal Steps 1/2:
Setup Daily Usage and Purchase Export Files for Actual and Amortized Billing
You need to have Daily Export Files for Usage and Purchase enabled per Subscription so that Yotascale can read your usage and cost details.
For each of your Subscriptions follow these steps to enable the Export Files, in case you have not done it yet.
If you actually already have created Export, but you see an error showing that we cannot read them, then it is because your IAM Role to the Subscription does not allow us to programmatically read from your Export files.
Please make sure you have one of these permission Roles in your Azure Subscription by following these steps.
Resource | Role |
Subscriptions |
|
To create Export files for a Subscription, you can either follow the steps highlighted below or follow the steps from this Azure guide to creating such an Export.
This needs to be done for both:
Actual cost (Usage and Purchases) - Select to export standard usage and purchases
Amortized cost (Usage and Purchases) - Select to export amortized costs for purchases like Azure reservations
These are the steps to enable the Cost Export Files for all Subscriptions under your Billing Account Scope:
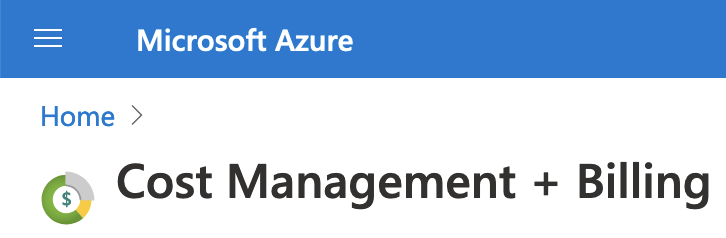
Go to your Cost Management and BIlling in your Azure account that you want to onboard with Yotascale
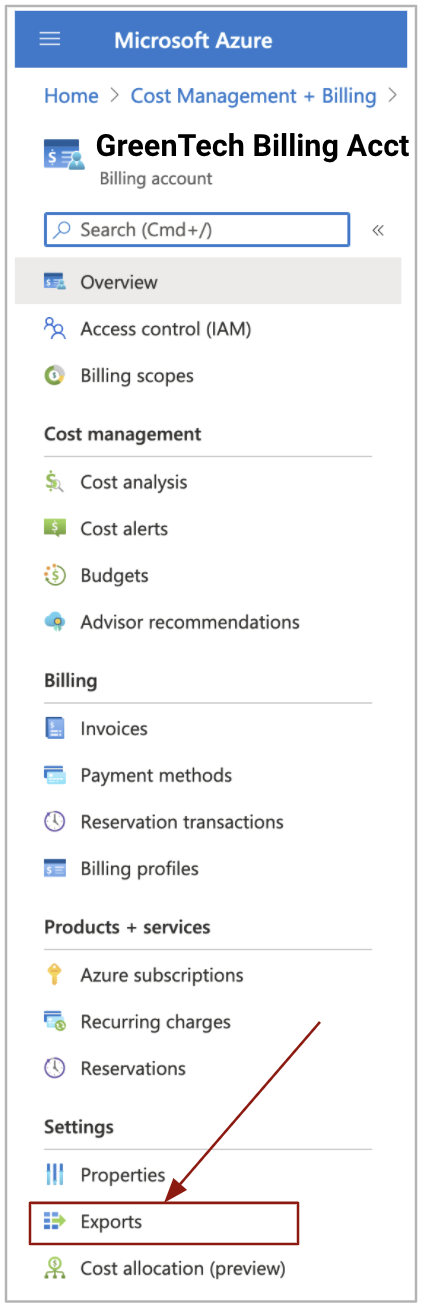
Click on the Billing Account you want to onboard with Yotascale
Click on Exports on the left menu at the bottom:
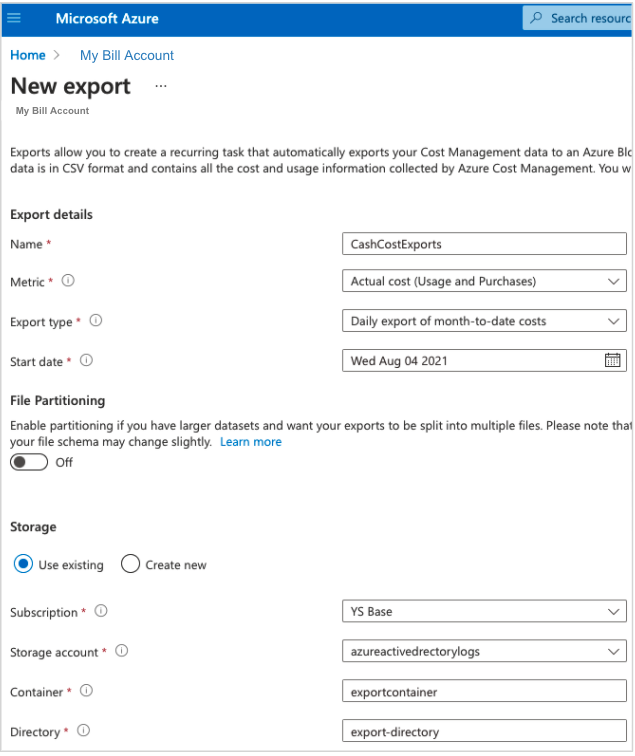
Example of what it looks like:
After you save, you’re done with Export Files. Remember you need to do this for the two types of billing data (Actual and Amortized).
Azure Portal Steps 2/2:
Create an App Registration as the umbrella for the Yotascale access, including creating a custom Read Role
This is a process that Azure provides to register an external client (application, user) to access your account data. It runs under the Microsoft login/Auth and other endpoints, and will also make it easy to track access for audit or security purposes.
This is the overall Azure guide about the Azure App Registration process.
The Azure App Registration is used to allow Yotascale to collect Cost Utilization Export files using the Azure Active Directory Mechanism.
The Role of the Service Principal that allows Yotascale to read your Cost and Utilization data, as well as Azure Advisor recommendations is as follows:
{
  "Name": "Yotascale-Read-Access-Role",
  "Description": "Permissions for Yotascale to Read Cost and Utilization Metrics",
  "Actions": [
    "Microsoft.Storage/storageAccounts/listkeys/action",
    "Microsoft.Storage/storageAccounts/read",
    "Microsoft.Storage/storageAccounts/blobServices/containers/read",
    "Microsoft.CostManagement/query/action",
    "Microsoft.CostManagement/exports/read",
    "Microsoft.Advisor/recommendations/read",
    "Microsoft.Storage/storageAccounts/blobServices/read",
    "Microsoft.ContainerService/containerServices/read",
    "Microsoft.ContainerService/managedClusters/read"
  ],
  "DataActions": [
    "Microsoft.Storage/storageAccounts/blobServices/containers/blobs/read"
  ],
  "NotDataActions": [],
  "AssignableScopes": []
}
To simplify the process, we provide a script that you need to run in your Azure CLI console.
Let’s go ahead and create this Read Access Role, and Register an App with Azure.
Download these two files
You may edit the “yotascale-access-role.json” if you want to change the role access control.
yotascale-app-registration.sh yotascale-access-role.json
Open your Azure CLI console: open the portal: https://portal.azure.com/
Click on the “Cloud Shell” icon at the menu bar

Click on the “upload” icon and update the two files you just download in step #1

Execute the script to create the role and create an Azure App Registration. Type
sh ./yotascale-app-registration.sh

The script will end with a few parameters. Please do not close this window as we need these for the registration to Yoascale

You are now done with the Azure CLI. Please keep the window open and go to the next step to enter these values.
What you need to do on the Yotascale dashboard
Now you only need to add the Azure App Registration information as well as the Cost Exports.
Login to https://next.yotascale.io
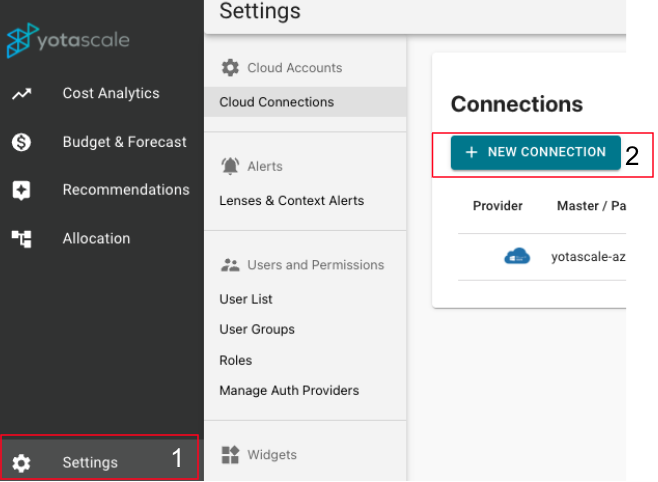
Go to “Settings” and then “Cloud Connections”
Select “Azure”
Select “MCA” or “EA” depending on your Azure account type
Copy all the parameters from the above Azure CLI to the Yotascale console
From Azure - “Cost Management and Billing” select your billing scope and then Exports which you created in the first step of this document. This is an example:

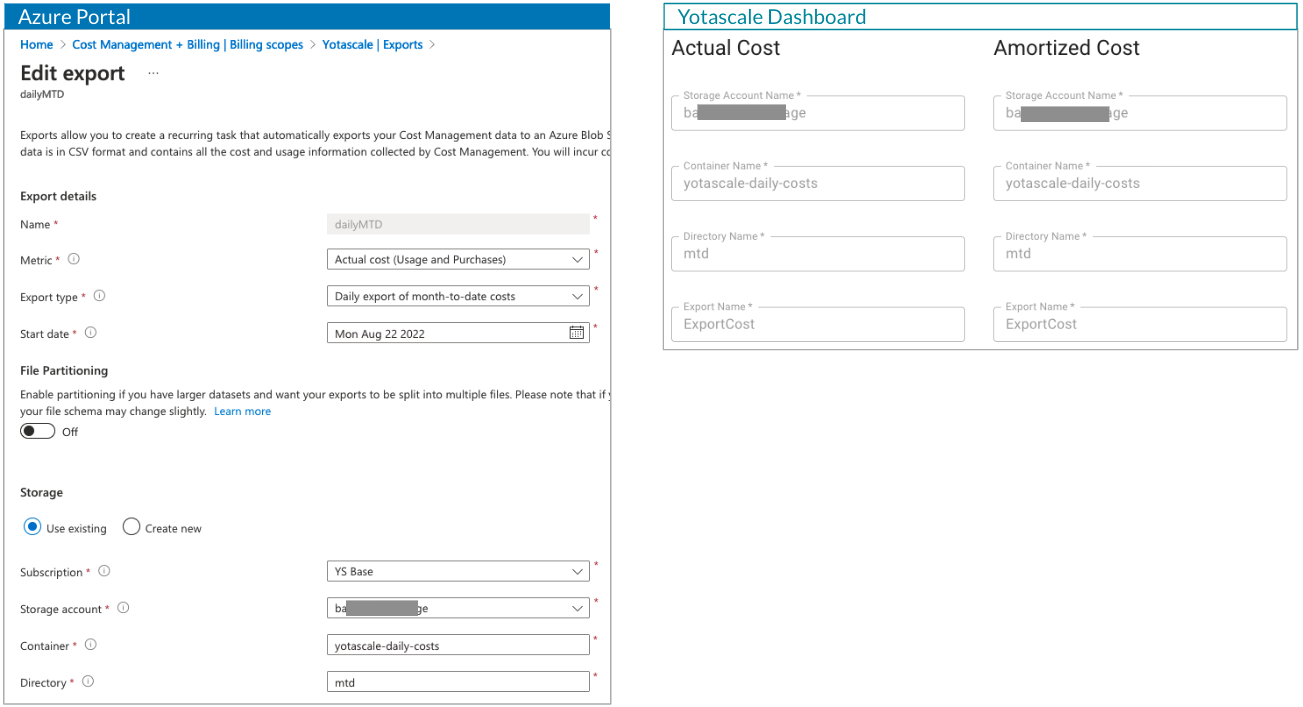
This will be entered for both Cash and Accrual:
You are done. Yotascale will automatically start the process of collecting Azure Exports and Read Advisor data, as well as collect Container Insight metrics if you running AKS with container insights enabled.